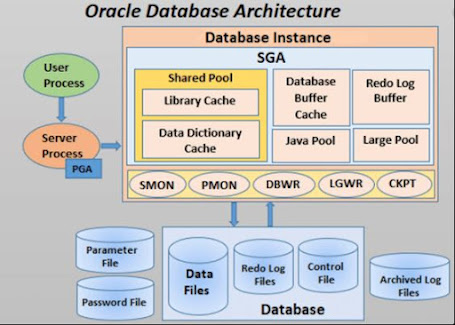
Mongodb architecture


Mongodb architecture


MongoDB is a NoSQL document-oriented database that offers a flexible, scalable, and high-performance data storage solution. MongoDB's architecture is designed to handle large volumes of data, distributed deployments, and provide high availability. Let's explore the key components of MongoDB's architecture:

  1. Document Model: MongoDB stores data in flexible, self-describing documents using BSON (Binary JSON) format. BSON documents are similar to JSON documents and can contain nested structures and arrays. Each document in MongoDB is identified by a unique "_id" field and can have varying sets of fields.

  2. Collections: MongoDB organizes related documents into collections, which are analogous to tables in relational databases. Collections are schema-less, allowing documents within a collection to have different structures. Documents within a collection can be indexed for efficient querying.

  3. Sharding: Sharding is a horizontal scaling technique in MongoDB that enables distributing data across multiple machines or shards. Each shard holds a subset of the data, and collectively they form a sharded cluster. Sharding allows MongoDB to handle large data volumes and accommodate high traffic loads.

  4. Sharded Cluster Components:

    • Shard: A shard is a single MongoDB server or replica set responsible for storing a portion of the data. Multiple shards work together to handle data distribution and parallel processing of queries.
    • Config Servers: Config servers store the metadata about the sharded cluster, including the mapping of data chunks to shards. They provide the necessary information for query routing and ensuring data consistency.
    • Query Routers: Query routers, also known as mongos, are responsible for receiving client requests and routing them to the appropriate shards based on the metadata from the config servers. They act as the entry point for client applications to interact with the sharded cluster.
  5. Replication: MongoDB supports replica sets, which provide high availability and data redundancy. A replica set consists of multiple MongoDB servers, where one server acts as the primary and the others serve as secondary replicas. The primary replica accepts write operations, while the secondary replicas replicate the primary's data asynchronously. If the primary fails, one of the secondary replicas automatically gets elected as the new primary, ensuring continuous availability.

  6. Indexing: MongoDB supports various types of indexes to improve query performance. Indexes can be created on individual fields, compound fields, text fields, geospatial data, and more. Indexes allow for efficient data retrieval by creating data structures that speed up the query process.

  7. WiredTiger Storage Engine: MongoDB utilizes the WiredTiger storage engine as the default storage engine since version 3.2. WiredTiger offers advanced features like compression, document-level concurrency control, and efficient storage layouts. It helps in improving performance, scalability, and storage efficiency.

  8. Aggregation Framework: MongoDB provides a powerful Aggregation Framework that allows for complex data processing and analysis. It supports various stages and operators to perform data transformations, filtering, grouping, and aggregations within the database.

  9. Security: MongoDB offers authentication and authorization mechanisms to secure the database. It supports username/password authentication, certificate-based authentication, and integration with external authentication providers. Access control can be enforced at the database, collection, and document levels.

MongoDB's architecture provides flexibility, scalability, and high availability for managing modern data requirements. It enables efficient handling of large-scale distributed deployments, horizontal scalability through sharding, and redundancy through replica sets, making it suitable for a wide range of applications and use cases.


Potgresql High Availability & Replication


Potgresql High Availability & Replication
 

PostgreSQL provides several mechanisms for achieving high availability and replication to ensure data redundancy, fault tolerance, and continuous availability of the database. Let's discuss some of the key features and techniques used in PostgreSQL for high availability and replication:

  1. Streaming Replication: PostgreSQL supports streaming replication, which is the foundation for high availability in a PostgreSQL cluster. In this setup, a primary server continuously streams its transaction logs, known as the Write-Ahead Log (WAL), to one or more standby servers. The standby servers apply the WAL records to maintain an up-to-date copy of the primary server's database.

    Streaming replication can be configured in two modes:

    • Asynchronous Replication: Standby servers asynchronously receive and apply the WAL records. Although it provides good availability and potential data protection, there may be a small delay between the primary and standby databases.
    • Synchronous Replication: Standby servers synchronously confirm the receipt and application of the WAL records, ensuring that transactions are committed on the primary only after they are safely replicated to the standby servers. Synchronous replication provides stronger data consistency but may introduce additional latency.
  2. Physical Replication: PostgreSQL's streaming replication operates at the physical level, replicating changes made to the database at the block level. This approach ensures that the entire database cluster is replicated, including all tables, indexes, and other objects.

  3. Logical Replication: In addition to physical replication, PostgreSQL also supports logical replication, which replicates data at the logical level based on the changes made to individual tables or specific data sets. Logical replication offers more flexibility and granularity, allowing selective replication of tables and columns, as well as the ability to perform data transformations during replication.

  4. Replication Slots: Replication slots are a feature in PostgreSQL that enables streaming replication. They act as a buffer for standby servers to ensure that the primary server retains enough WAL records to support the streaming replication. Replication slots automatically manage the retention of WAL segments and prevent them from being removed before the standby server has received and applied them.

  5. Automatic Failover: To achieve high availability, PostgreSQL can be combined with external tools and frameworks that provide automatic failover capabilities. For example, tools like repmgr, Patroni, or Pgpool-II can monitor the health of the primary server and automatically promote a standby server to become the new primary in case of a failure. These tools can also handle the reconfiguration of clients to connect to the new primary server.

  6. Cluster Load Balancing: PostgreSQL clusters can be load balanced using various techniques to distribute client connections across multiple servers. Load balancing helps in achieving scalability, better resource utilization, and improved fault tolerance. Tools like Pgpool-II and HAProxy are commonly used for load balancing PostgreSQL clusters.

  7. Hot Standby: PostgreSQL allows read-only queries to be executed on standby servers while they are actively replicating data from the primary server. This feature, known as Hot Standby, enables better utilization of standby servers by offloading read traffic from the primary server, thereby improving overall performance.

By leveraging these features and techniques, PostgreSQL provides robust high availability and replication capabilities, ensuring data durability, fault tolerance, and continuous database availability for critical applications.


Postgres System Architecture

 Postgres System Architecture


PostgreSQL, often referred to as Postgres, is an open-source relational database management system (RDBMS) known for its robustness, reliability, and extensive feature set. Let's explore the system architecture of PostgreSQL.

  1. Client-Server Model: PostgreSQL follows a client-server model. Multiple clients can connect to a PostgreSQL server simultaneously and interact with the database. Clients communicate with the server using various protocols such as TCP/IP, Unix domain sockets, or shared memory.

  2. Process Architecture: PostgreSQL utilizes a process-based architecture, where multiple processes collaborate to handle client requests and manage the database. The key processes in a typical PostgreSQL setup are:

    • Postmaster: The postmaster process acts as the central coordinator and manages the startup and shutdown of other processes. It listens for client connections and forks new backend processes for handling client requests.

    • Backend Processes: Backend processes are responsible for executing client queries, managing transactions, and performing various database operations. Each client connection is associated with a separate backend process, which handles the communication with the client and executes SQL statements on behalf of the client.

    • Shared Memory and Background Processes: PostgreSQL employs shared memory to share data structures and caches among processes efficiently. Additionally, there are several background processes like autovacuum, background writer, and WAL writer that handle maintenance tasks, write-ahead logging, and other system operations.

  3. Storage Architecture: PostgreSQL stores its data on disk using a combination of files organized into tablespaces. The main components of the storage architecture include:

    • Relational Databases: A PostgreSQL installation can consist of multiple independent databases, each with its schema and data. Each database has its set of tables, views, indexes, and other database objects.

    • Tables and Indexes: Data within a database is organized into tables, which consist of rows and columns. PostgreSQL supports various storage methods like heap tables, b-tree indexes, hash indexes, and more.

    • Write-Ahead Logging (WAL): PostgreSQL uses a transaction log called the Write-Ahead Log to ensure durability and provide crash recovery. The WAL records changes made to the database before they are applied to the actual data files.

    • Shared Buffers and Caches: PostgreSQL employs shared memory buffers to cache frequently accessed data pages, reducing disk I/O and improving performance. Caches include the shared buffer cache, the operating system cache, and various internal caches like the query plan cache.

  4. Query Processing and Execution: When a client sends a query to the PostgreSQL server, the query goes through a series of steps:

    • Parsing and Analysis: The server parses the query to understand its structure and performs semantic analysis to check for correctness, resolve object names, and validate access privileges.

    • Query Optimization: PostgreSQL's query optimizer analyzes the query and generates an optimal query plan, determining the most efficient way to execute the query based on available indexes, statistics, and cost estimations.

    • Query Execution: The chosen query plan is executed by the backend process. Data is retrieved from disk or memory, and any necessary locks or concurrency control mechanisms are applied. The execution engine processes the data and returns the result to the client.

  5. Extensions and Plug-Ins: PostgreSQL provides a rich ecosystem of extensions and plug-ins that enhance its functionality. Extensions can introduce new data types, operators, indexing methods, procedural languages, and more. They integrate seamlessly into the PostgreSQL architecture and can be loaded and used on-demand.

Overall, PostgreSQL's system architecture is designed to provide reliability, performance, and extensibility while maintaining data integrity and offering a comprehensive set of features for building robust database applications.


PostgreSQL Backup


 PostgreSQL Backup


In PostgreSQL, there are multiple methods available for performing backups. Here are some commonly used backup methods:
 
pg_dump: The pg_dump utility is a command-line tool that creates logical backups of PostgreSQL databases. It generates a SQL script that contains the database schema and data. To perform a backup, you can use the following command:


pg_dump -U <username> -d <database_name> -f <backup_file.sql>

This command will create a backup of the specified database and store it in the specified file.

pg_dumpall: The pg_dumpall utility is similar to pg_dump but creates a backup of all databases in the PostgreSQL cluster, including global objects and roles. It can be used to perform a full system backup. The command to use is:


pg_dumpall -U <username> -f <backup_file.sql>

This command will create a backup of the entire PostgreSQL cluster and store it in the specified file.

pg_basebackup: The pg_basebackup utility is used to create a physical backup of the entire PostgreSQL cluster. It takes a base backup of the data directory and allows for incremental backups using the Write Ahead Log (WAL) files. The command to use is:


    pg_basebackup -U <username> -D <backup_directory> -Ft -Xs -P

    This command will create a physical backup of the PostgreSQL cluster in the specified directory.

    Continuous Archiving (WAL): Continuous archiving with Write Ahead Log (WAL) files provides a method for creating incremental backups. It involves configuring PostgreSQL to archive the WAL files and then periodically copying them to a backup location. This method allows for point-in-time recovery and is often used in combination with other backup methods.

It's important to note that backups should be stored in a secure and separate location from the production database. Additionally, it's recommended to test the backup and restore procedures regularly to ensure their effectiveness.

Apart from these native backup methods, there are also third-party tools and solutions available that provide additional features and flexibility for PostgreSQL backups.

Oracle 19c new features

 Oracle 19c new features


Oracle 19c, released in 2019, introduced several new features and enhancements across various areas of the database. Here are some notable features introduced in Oracle 19c:

  1. Automatic Indexing: Oracle 19c introduced the Automatic Indexing feature, which uses machine learning algorithms to identify and create indexes on tables automatically. This feature can improve query performance by automatically creating and maintaining indexes based on usage patterns.

  2. Real-Time Statistics: Oracle 19c enhanced the statistics gathering process by introducing real-time statistics. Instead of relying solely on scheduled statistics collection jobs, real-time statistics allow the optimizer to use more accurate and up-to-date statistics during query optimization, resulting in better query plans.

  3. Hybrid Partitioned Tables: With Oracle 19c, you can create hybrid partitioned tables that combine the benefits of both partitioning and non-partitioned tables. This allows for more flexible data management and improved performance for specific use cases.

  4. Multitenant Database Improvements: Oracle Multitenant, introduced in earlier versions, received several enhancements in 19c. These include increased capacity limits for pluggable databases (PDBs), improved cross-container operations, and simplified management operations for PDBs.

  5. Automatic Data Optimization: Oracle 19c introduced Automatic Data Optimization (ADO), which allows for the automatic compression and movement of data between different storage tiers based on usage patterns and policies. ADO enables cost-effective data lifecycle management and improves storage efficiency.

  6. Real Application Clusters (RAC) Improvements: Oracle 19c brought enhancements to Real Application Clusters (RAC), including better workload management and performance with the introduction of application continuity and the capability to prioritize resource allocation for specific workloads.

  7. Database In-Memory Improvements: The In-Memory column store feature, introduced in earlier versions, received performance and usability enhancements in Oracle 19c. This includes improved in-memory join performance, support for larger In-Memory column stores, and the ability to dynamically track usage statistics for In-Memory objects.

  8. Security Enhancements: Oracle 19c introduced several security enhancements, such as the ability to manage user privileges through a role commonality feature, support for password-less authentication using external services, and enhancements to Oracle Data Redaction for sensitive data protection.

These are just a few of the key features and enhancements introduced in Oracle 19c. Oracle regularly releases updates and patches, so it's always recommended to consult the official Oracle documentation and release notes for the most up-to-date information on features and enhancements in a specific version.


MySQL Architecture

 MySQL Architecture 


The architecture of a MySQL database involves several key components that work together to store, manage, and access data. Here is an overview of the MySQL database architecture:

  1. Client: The client is an application or program that connects to the MySQL server to interact with the database. It can be a command-line tool, a graphical user interface (GUI), or a web application.

  2. MySQL Server: The MySQL server is the core component of the database system. It receives and processes client requests, manages database connections, and executes SQL queries. It consists of several subcomponents:

    a. Connection Handler: The connection handler manages incoming client connections, authenticates users, and establishes communication channels between the server and the client.

    b. Query Parser: The query parser parses SQL statements received from clients and transforms them into an internal representation for query execution.

    c. Optimizer: The optimizer analyzes query execution plans and determines the most efficient way to execute SQL queries based on indexes, statistics, and other factors.

    d. Query Executor: The query executor executes the SQL queries, retrieves data from the storage engine, performs data manipulation, and returns results to the client.

  3. Storage Engines: MySQL supports multiple storage engines that determine how data is stored and accessed. Each storage engine has its own characteristics, features, and performance considerations. Common storage engines include InnoDB, MyISAM, MEMORY (HEAP), and more.

  4. Data Dictionary: The data dictionary stores metadata about database objects, such as tables, columns, indexes, and privileges. It provides information about the structure and organization of the database and is used by the server to process queries and enforce data integrity.

  5. Caches and Buffers: MySQL utilizes various caches and buffers to improve performance:

    a. Query Cache: The query cache stores the results of SELECT queries, allowing subsequent identical queries to be served directly from the cache, reducing the need for query execution.

    b. Buffer Pool: The buffer pool is an area of memory used by the InnoDB storage engine to cache frequently accessed data pages, reducing disk I/O and improving query performance.

    c. Key Buffer: The key buffer (also known as the key cache) is used by the MyISAM storage engine to cache index blocks, speeding up index lookups.

  6. Disk Storage: MySQL databases are typically stored on disk as data files. The data files contain table data, indexes, and other database objects. Each storage engine has its own file format and organization.

The architecture of a MySQL database is designed to provide efficient data storage, query execution, and management of client connections. Understanding the components and their interactions is essential for optimizing performance, ensuring data integrity, and scaling the database system to handle increased workloads.

PostgreSQL Vacuum

 PostgreSQL Vacuum


In PostgreSQL, VACUUM is a crucial process used for managing and reclaiming disk space occupied by deleted or outdated data within database tables. The VACUUM process performs the following tasks:

  1. Freeing Up Space: When rows are deleted or updated in PostgreSQL, the space occupied by the old versions of the rows is not immediately reclaimed. Instead, they are marked as "dead" tuples and remain in the table until a VACUUM process is executed. VACUUM identifies these dead tuples and frees up the occupied space, making it available for future use.

  2. Preventing Transaction ID Wraparound: PostgreSQL uses transaction IDs (XIDs) to track the visibility and validity of tuples. If the number of transactions exceeds the capacity of the XID counter, a transaction ID wraparound can occur, leading to data corruption. Regularly running VACUUM helps prevent this by recycling old transaction IDs.

  3. Updating Statistics: VACUUM analyzes and updates the statistics of tables, which is vital for the query planner to make efficient decisions when generating query plans. Accurate statistics help in determining the optimal execution plans and improving query performance.

  4. Maintaining Data Consistency: VACUUM ensures that the database remains in a consistent state by reclaiming space, updating transaction information, and preventing transaction ID wraparound. It helps maintain the integrity and reliability of the database.

There are different variants of the VACUUM command in PostgreSQL, each serving a specific purpose:

  1. VACUUM: The basic VACUUM command without any additional options performs the standard VACUUM operation. It reclaims space and updates statistics for all tables in the current database.

  2. VACUUM ANALYZE: This variant of VACUUM performs both the standard VACUUM and analyzes the table to update statistics. It is commonly used when you want to optimize the table for query performance.

  3. VACUUM FULL: VACUUM FULL is an intensive variant of the VACUUM command that reclaims all unused space in the table, not just the space occupied by dead tuples. It requires exclusive lock on the table and can be resource-intensive.

  4. Autovacuum: PostgreSQL has an autovacuum feature that automatically performs VACUUM and analyzes operations in the background based on the configuration settings. Autovacuum helps ensure that VACUUM is regularly executed without manual intervention.

Regularly running VACUUM, either manually or through autovacuum, is essential to maintain optimal performance and disk space utilization in PostgreSQL databases. It helps prevent bloat, ensures data integrity, and provides accurate statistics for query optimization.


MySQL Storage Engines

 MySQL Storage Engines 


MySQL provides various storage engines that offer different features and capabilities to meet specific application requirements. Each storage engine has its own way of storing and accessing data. Here are some commonly used storage engines in MySQL:

  1. InnoDB: InnoDB is the default storage engine in MySQL since version 5.5. It provides ACID-compliant transactions, row-level locking, foreign key constraints, and crash recovery. InnoDB supports the concept of clustered indexes and provides excellent concurrency control, making it suitable for general-purpose applications.

  2. MyISAM: MyISAM is a storage engine known for its simplicity and high performance. It offers table-level locking, which can be less efficient for concurrent write operations but allows for faster read operations. MyISAM doesn't support transactions or foreign key constraints but is often used for read-heavy applications or non-transactional data.

  3. Memory (HEAP): The Memory storage engine stores data in memory rather than on disk. It is fast and suitable for temporary data or caching purposes. However, data stored in the Memory engine is volatile and gets lost on server restart.

  4. Archive: The Archive storage engine is designed for storing large amounts of data efficiently. It compresses data and supports sequential access, making it suitable for data archiving or logging purposes. Archive tables do not support indexing and perform best with append-only operations.

  5. NDB (MySQL Cluster): The NDB storage engine, also known as MySQL Cluster, is designed for high availability and scalability. It uses distributed, in-memory storage across multiple nodes and supports automatic data partitioning and replication. NDB is well-suited for applications that require real-time access and high availability, such as web applications or telecom systems.

  6. CSV: The CSV storage engine stores data in comma-separated values format. It allows importing and exporting data in CSV format and is useful for simple data storage or data interchange between different systems.

  7. InnoDB Cluster (Group Replication): InnoDB Cluster, also known as Group Replication, is a multi-master, highly available, and scalable solution provided by MySQL. It combines InnoDB storage engine with a group replication plugin to enable synchronous replication and automatic failover.

Note that the availability of specific storage engines may vary depending on the MySQL version and configuration. It's important to consider the specific needs of your application, such as performance, transaction support, and high availability, when choosing the appropriate storage engine for your MySQL database.

Oracle Memory architecture

 Oracle Memory architecture


Oracle database uses several memory structures to manage and optimize database operations. These memory structures are collectively referred to as the System Global Area (SGA) and the Program Global Area (PGA). Here are the main memory structures in Oracle:

System Global Area (SGA):

  1. Database Buffer Cache: The buffer cache holds copies of data blocks read from data files. It reduces disk I/O by caching frequently accessed data in memory, improving query performance.

  2. Redo Log Buffer: The redo log buffer stores changes made to the database before they are written to the redo log files. It ensures that all changes are recorded for recovery and provides high-performance transaction logging.

  3. Shared Pool: The shared pool consists of the Library Cache and the Data Dictionary Cache. The Library Cache stores SQL statements, execution plans, and other shared SQL and PL/SQL code. The Data Dictionary Cache stores information about database objects, user privileges, and other metadata.

  4. Large Pool: The large pool is an optional memory area used for large-scale allocations and I/O buffers for backup and restore operations, parallel execution, and session memory.

  5. Java Pool: The Java pool stores Java objects and bytecode for Java stored procedures and other Java-related operations.

  6. Streams Pool: The Streams pool is used by Oracle Streams, a feature for data replication and messaging. It stores buffered messages and other Streams-related data.

Program Global Area (PGA):

  1. Stack Space: The stack space is allocated for each session or process in the database. It contains session-specific data, including variables, parameters, and cursor state information.

  2. Private SQL Area: The private SQL area stores information specific to each SQL statement being executed, such as bind variables, query execution plans, and runtime buffers.

  3. Sorting Area: The sorting area is used for sorting operations, such as ORDER BY and GROUP BY clauses. It stores temporary data during sorting operations.

  4. Session Memory: Session memory includes various session-specific memory structures, such as session parameters, session cursors, and session-specific work areas.

These memory structures collectively manage and optimize the database's performance and resource utilization. The sizes of these memory areas can be configured and tuned based on the system's requirements and workload characteristics to ensure optimal performance and efficient memory usage in the Oracle database.


Oracle Undo Tablespace

 Oracle Undo Tablespace


In Oracle, the undo tablespace is a crucial component of the database that is used to manage and store undo information. Undo data represents the changes made to the database, such as modifications or deletions, that are necessary to roll back transactions or provide read consistency.

Here are some key points about the undo tablespace in Oracle:

  1. Purpose of Undo Tablespace: The undo tablespace is primarily used to provide transactional consistency and support various Oracle features like read consistency, flashback queries, and transaction rollback. It stores the before-images of the data blocks affected by transactions.

  2. Rollback Segments vs. Undo Tablespaces: In earlier versions of Oracle, rollback segments were used to manage undo data. However, starting with Oracle 9i, the undo tablespace was introduced as a more efficient and flexible alternative to manage undo information.

  3. Automatic Undo Management: Oracle introduced the concept of Automatic Undo Management (AUM) to simplify the administration of undo tablespaces. With AUM, the DBA does not need to manually manage rollback segments; instead, Oracle automatically manages the undo space allocation and retention.

  4. Undo Retention: Undo retention refers to the period for which undo data is retained in the undo tablespace. It determines the availability of consistent read data for queries and provides the timeframe during which a transaction can be rolled back. The undo retention is controlled by the UNDO_RETENTION parameter.

  5. Undo Tablespace Size: The size of the undo tablespace depends on the workload and the retention requirements of the system. The DBA needs to monitor the size of the undo tablespace and adjust it accordingly to prevent issues like ORA-01555 (snapshot too old) or ORA-30036 (unable to extend segment).

  6. Multiple Undo Tablespaces: Starting with Oracle 11g, multiple undo tablespaces can be created to provide better manageability, performance, and availability. Multiple undo tablespaces can be used for different purposes or to separate undo segments for specific applications or tablespaces.

  7. Flashback Features: The undo tablespace plays a crucial role in providing flashback features such as Flashback Query, Flashback Transaction, and Flashback Table. These features utilize the undo information to view past data or undo specific transactions.

The undo tablespace is an essential component in Oracle databases, responsible for maintaining the integrity, consistency, and concurrency of transactions. It enables features like read consistency, transaction rollback, and flashback queries, providing a reliable and efficient environment for data management and recovery.


Physical Standby Protection mode

 Types of protection mode in Oracle physical standby


Oracle Data Guard provides different protection modes that determine the level of data protection and availability provided by the standby database. The protection mode defines how transactions are committed and synchronized between the primary and standby databases. The three primary protection modes in Oracle Data Guard are:

  1. Maximum Performance (ASYNC): In Maximum Performance mode, the primary database commits transactions as soon as possible without waiting for the standby database to acknowledge the redo data. This mode offers the highest level of performance for the primary database but provides the least level of data protection. There is a potential for data loss if a primary database failure occurs before the redo data is transmitted to the standby database.

  2. Maximum Availability (SYNC): In Maximum Availability mode, the primary database waits for at least one standby database to acknowledge the redo data before committing the transaction. This ensures that data is protected from the loss of a single database in the event of a failure. However, it may introduce some additional latency and potentially impact the primary database performance due to the synchronous network round-trip.

  3. Maximum Protection (SYNC): In Maximum Protection mode, the primary database waits for all standby databases to acknowledge the redo data before committing the transaction. This provides the highest level of data protection but can introduce additional latency and impact the primary database performance due to the synchronous network round-trip. It ensures zero data loss in case of a single or multiple standby database failures.

In addition to these primary protection modes, Oracle Data Guard also provides a few other advanced protection modes that offer more granular control over data protection. These advanced modes include:

  • Far Sync Instance: A Far Sync Instance is an intermediary instance that acts as a buffer between the primary database and remote standby databases. It provides zero data loss protection in cases where the primary and standby databases are geographically distant.

  • Fast-Start Failover (FSFO): Fast-Start Failover is a feature that enables automatic failover to a standby database in case of a primary database failure. It reduces downtime and minimizes the impact on the application.

  • Cascading Standby Databases: Cascading standby databases allow the creation of multiple levels of standby databases. Redo data is cascaded from the primary database to a remote standby database, and then from that standby database to another standby database. This can be used to protect against disasters that affect an entire data center or region.

Each protection mode has its own trade-offs in terms of performance, data protection, and availability. It is important to carefully evaluate the requirements and constraints of the environment to choose the appropriate protection mode that aligns with the organization's objectives and data protection needs.


Oracle Physical Standby

 Oracle Physical Standby


In Oracle, a physical standby database is a type of standby database that maintains an exact copy of the primary database by continuously applying redo data from the primary database. It serves as a failover solution and provides high availability and data protection.

Here are key points to understand about a physical standby database in Oracle:

  1. Data Synchronization: The physical standby database stays synchronized with the primary database by receiving and applying redo data, which contains all the changes made to the primary database. Redo data is shipped from the primary database and applied to the physical standby database using redo apply technology.

  2. Data Protection: The physical standby database provides data protection by maintaining a synchronized copy of the primary database. In the event of a primary database failure, the physical standby database can be quickly activated to take over as the new primary database, minimizing downtime and data loss.

  3. Continuous Redo Apply: The physical standby database continuously applies redo data received from the primary database, keeping the standby database up-to-date. Redo apply applies the changes to the standby database's data files, ensuring they mirror the primary database's data.

  4. Read-Only Access: In addition to serving as a failover solution, the physical standby database can also be used for read-only reporting or offloading backup activities. This is possible because the standby database is an exact replica of the primary database.

  5. Managed Recovery Process (MRP): The Managed Recovery Process (MRP) is the background process responsible for applying redo data to the physical standby database. It continuously runs on the standby database and applies redo data as it is received, keeping the standby database synchronized.

  6. Data Guard: Oracle Data Guard is the primary technology used to configure and manage physical standby databases. It provides various features and options to ensure data synchronization, automatic failover, and management of the standby database.

  7. Switchover and Failover: Switchover is the planned transition from the primary database to the standby database, where roles are reversed. Failover is the unplanned transition that occurs when the primary database becomes unavailable, and the standby database takes over as the new primary database.

By implementing a physical standby database, organizations can achieve high availability and data protection, ensuring that their critical Oracle databases remain accessible and their data remains safe in the event of primary database failures.


Oracle RAC SCAN

 Oracle RAC SCAN


Oracle RAC SCAN, which stands for Single Client Access Name, is a feature in Oracle Real Application Clusters (RAC) that provides a single virtual hostname for client connections to the cluster database. The SCAN simplifies client connectivity and load balancing by abstracting the underlying cluster configuration and presenting a unified endpoint.

Here are key points to understand about Oracle RAC SCAN:

  1. Simplified Client Connectivity: Instead of connecting to individual node names or VIP (Virtual IP) addresses, clients connect to the SCAN. The SCAN acts as a single virtual hostname that remains constant regardless of the cluster size or configuration changes.

  2. SCAN VIP: The SCAN is associated with three SCAN VIPs (Virtual IP addresses). These VIPs are assigned to network interfaces on different nodes within the cluster. Each node in the cluster listens on all three VIPs, allowing clients to connect to any SCAN VIP.

  3. SCAN Listener: The SCAN Listener is a single listener process that runs on each node in the cluster. It listens on the SCAN VIPs and handles incoming client connection requests. The SCAN Listener redirects client connections to the appropriate node and instance within the cluster.

  4. Load Balancing: The SCAN Listener performs load balancing by distributing client connections across the available nodes and instances in the RAC cluster. It uses a load-balancing algorithm to evenly distribute client requests and optimize resource utilization.

  5. High Availability: The SCAN provides high availability for client connections. If a node or SCAN VIP fails, the SCAN VIP is automatically relocated to another node, ensuring uninterrupted client connectivity. Clients do not need to update their connection details in case of node failures.

  6. Transparent Node Addition/Removal: Adding or removing nodes from the RAC cluster does not impact client connectivity. Clients continue to connect to the SCAN, and the SCAN Listener dynamically adjusts the routing of connections to reflect the updated cluster configuration.

  7. SCAN Configuration: The SCAN is configured during the installation or configuration of Oracle RAC. It requires a SCAN hostname and a corresponding DNS entry pointing to the SCAN VIPs. Clients use the SCAN hostname to connect to the cluster database.

By utilizing the Oracle RAC SCAN feature, clients can connect to the cluster database without needing to be aware of the underlying cluster configuration. The SCAN provides a unified and load-balanced entry point, enhancing scalability, availability, and ease of client connectivity in Oracle RAC environments.


Oracle RAC Scan IP

 Scan IP:


In Oracle Real Application Clusters (RAC), SCAN stands for Single Client Access Name. It is a virtual IP address that provides a single name for clients to connect to the database service, regardless of the number of nodes or instances in the cluster. The SCAN IP simplifies client connectivity and load balancing in a RAC environment.

The SCAN IP is associated with the SCAN listener, which is a single listener process that runs on each node in the cluster. When a client connects to the SCAN IP, the SCAN listener routes the connection to one of the available nodes in the cluster, distributing the workload across multiple instances.

Here are some key points about SCAN IP in Oracle RAC:

  1. Simplified Client Connectivity: Instead of specifying individual node addresses or instance names, clients can connect to the SCAN IP to access the RAC database. This simplifies the client configuration and eliminates the need to update client connection details when the cluster topology changes.

  2. Load Balancing: The SCAN listener performs load balancing by distributing client connections across the available nodes. It uses a load-balancing algorithm to route each connection request to a different node, distributing the workload evenly across the cluster.

  3. Transparent Node Addition/Removal: With the SCAN IP, adding or removing nodes from the cluster does not impact client connectivity. Clients continue to connect to the SCAN IP, and the SCAN listener automatically redirects the connections to the appropriate nodes, even if the cluster topology changes.

  4. High Availability: The SCAN IP enhances high availability by providing a single, highly available entry point for client connections. If a node or SCAN listener fails, the SCAN VIP is automatically relocated to another node, ensuring continuous client connectivity.

  5. SCAN VIP and SCAN Listener: The SCAN IP consists of a virtual IP address (SCAN VIP) and a corresponding SCAN listener. The SCAN VIP is assigned to one of the nodes in the cluster, and the SCAN listener runs on each node to handle client connections to the SCAN IP.

By using the SCAN IP in Oracle RAC, clients can connect to the database service seamlessly, without the need to manage individual node addresses. The SCAN IP provides a centralized and load-balanced access point to the RAC database, enhancing scalability, availability, and ease of client connectivity.

Oracle Datagaurd Background Process

 Oracle Datagaurd Background Process


In Oracle Data Guard, background processes play a vital role in managing and maintaining the standby database and ensuring data protection and availability. These processes work in conjunction with primary and standby databases to facilitate data replication, synchronization, and failover operations. Here are some important background processes in Oracle Data Guard:

  1. Log Writer (LGWR): The LGWR process is responsible for writing redo log records to the online redo log files on the primary database. In a Data Guard configuration, LGWR also transmits redo data to the standby database(s) for applying the changes.

  2. Archiver (ARCn): The archiver process (ARCn) copies the archived redo log files from the primary database to the standby database(s). These archived logs are essential for maintaining the standby database in sync with the primary database.

  3. Media Recovery (MRP) Process: The Media Recovery Process (MRP) is responsible for applying redo data received from the primary database to the standby database(s). It continuously applies the archived redo logs to bring the standby database up to date with the primary database.

  4. Data Guard Broker Processes: The Data Guard Broker is a management framework for configuring, monitoring, and controlling Data Guard configurations. It includes various background processes, such as DGMGRL (Data Guard Manager Command-Line Interface) and DMON (Data Guard Broker Monitor). These processes handle the configuration and management tasks of the Data Guard setup.

  5. Log Apply Services (LNSn and RFS): Log Apply Services are responsible for transmitting and applying redo data from the primary database to the standby database(s). The Log Network Server (LNSn) on the primary database transmits redo data to the Remote File Server (RFS) process on the standby database, which applies the redo data.

  6. RFS (Remote File Server) Process: The RFS process receives the archived redo logs and standby redo logs from the primary database and applies them to the standby database. It is responsible for managing the transmission, receipt, and application of redo data.

  7. Data Guard Net Services (LNSn and NSSn): Data Guard Net Services processes handle the network communication between the primary and standby databases. The Log Network Server (LNSn) on the primary database and the Net Services Server (NSSn) on the standby database facilitate the efficient transmission of redo data and other communication required for Data Guard operations.

These are some of the key background processes involved in Oracle Data Guard. They work together to ensure data replication, synchronization, and failover capabilities, providing high availability and data protection for Oracle databases.


Oracle RAC Background process

 Oracle RAC Background process


In Oracle Real Application Clusters (RAC), background processes play a crucial role in managing the shared resources, coordination, and synchronization among the multiple instances that make up the cluster. These processes are specific to RAC and work together to ensure high availability, scalability, and fault tolerance. Here are some important background processes in Oracle RAC:

  1. Global Cache Service (GCS) Process: The GCS process manages the Global Cache Service, which is responsible for coordinating access to data blocks residing in the global cache across different instances. It handles block requests, grants or denies access, and manages the distributed lock management for data concurrency.

  2. Global Enqueue Service (GES) Process: The GES process manages the Global Enqueue Service, which handles lock management for non-data resources such as shared resources, library cache objects, and sequences across the RAC instances. It manages and coordinates the access and release of these enqueues across multiple instances.

  3. Global Resource Directory (GRD) Process: The GRD process maintains the Global Resource Directory, which is a shared memory structure that contains information about the ownership and location of cached data blocks and enqueues. It provides a centralized view of the resources and their statuses across the RAC instances.

  4. Cache Fusion Process: The Cache Fusion process handles the inter-instance communication and transfer of data blocks between the instances' local caches. It enables efficient data sharing and avoids unnecessary disk I/O by allowing instances to access each other's data blocks directly.

  5. Network Listener Process: The Network Listener process listens for incoming connection requests from clients and routes them to the appropriate RAC instance. It handles the initial connection establishment and enables clients to connect to any available instance in the RAC cluster.

  6. LMS Process: The Lock Manager Server (LMS) process handles lock management and coordination between instances. It manages the distributed locks and ensures data consistency and integrity in the RAC environment.

  7. GES/GCS Recovery Server (RS) Process: The GES/GCS Recovery Server process handles recovery operations in case of instance failures. It manages the recovery and redistribution of cached data blocks and enqueues to ensure data availability and consistency.

  8. LMON Process: The Global Enqueue Service Monitor (LMON) process monitors the health and availability of the GES and GCS processes. It detects failures and takes appropriate actions to recover or reconfigure the resources in case of failures or reconfiguration events.

These are some of the key background processes in Oracle RAC. They work together to provide high availability, scalability, and efficient resource management in a clustered database environment.

MySQL Background Process

 MySQL Background Process


In MySQL, background processes are responsible for various tasks that support the functioning and performance of the database system. These processes run continuously in the background and handle activities such as memory management, I/O operations, query execution, and monitoring. Here are some important background processes in MySQL:

  1. MySQL Server Process: The MySQL server process, also known as the mysqld process, is the main process that handles client connections, query execution, and overall management of the MySQL server. It coordinates with other background processes to perform different tasks.

  2. InnoDB Buffer Pool: InnoDB is the default storage engine in MySQL, and it utilizes a buffer pool to cache frequently accessed data pages in memory. The InnoDB Buffer Pool background process manages the buffer pool, including reading data from disk into the buffer pool and flushing modified pages back to disk.

  3. InnoDB Log Writer: The InnoDB Log Writer process (also called the InnoDB Log Flush or Log IO Thread) writes the changes made to the InnoDB redo log files. It ensures that the redo log records are durably stored on disk, providing transaction durability and crash recovery capabilities.

  4. InnoDB Page Cleaner: The InnoDB Page Cleaner process is responsible for the asynchronous flushing of dirty pages from the buffer pool to disk. It helps in maintaining a balance between data modifications and background flushing, optimizing I/O operations and database performance.

  5. MySQL Master/Slave Replication: In a replication setup, MySQL utilizes background processes to manage replication between the master and slave servers. These processes include the binary log sender (on the master) and the I/O thread and SQL thread (on the slave) to receive and apply the replicated changes.

  6. MySQL Event Scheduler: The MySQL Event Scheduler is a background process that manages the execution of scheduled events defined in the database. It triggers and runs events at specified times or intervals, enabling automation of various database tasks.

  7. MySQL Enterprise Monitor Agent: The MySQL Enterprise Monitor Agent is an optional background process used in MySQL Enterprise Edition. It collects performance and status data from the MySQL server and sends it to the MySQL Enterprise Monitor for monitoring, analysis, and alerting.

  8. MySQL Thread Pool: The MySQL Thread Pool is a background process that manages client connections and thread reuse. It helps in optimizing thread creation and handling, reducing the overhead associated with creating and destroying threads for each client connection.

These are some of the important background processes in MySQL. Each process plays a crucial role in ensuring the efficient operation, performance, and reliability of the MySQL database server.


Oracle Background Process

 Oracle Background Process


In Oracle Database, background processes are essential components that handle various tasks to support the functioning and performance of the database system. These processes run in the background and perform critical activities such as memory management, I/O operations, recovery, and monitoring. Here are some important background processes in Oracle:

  1. System Monitor (SMON): SMON is responsible for instance recovery, which ensures the database is in a consistent state after an instance crash or failure. It recovers the database by applying undo and redo logs to roll forward or roll back transactions.

  2. Process Monitor (PMON): PMON is responsible for process cleanup and process recovery. It detects and resolves failed and terminated processes, releasing system resources associated with them. PMON also performs process recovery during instance recovery.

  3. Database Writer (DBWn): DBWn processes (DBW0, DBW1, etc.) are responsible for writing modified database buffers from the database buffer cache to data files on disk. They ensure that dirty buffers are periodically written to disk, reducing the risk of data loss during a system failure.

  4. Log Writer (LGWR): LGWR writes redo log buffers to the redo log files on disk. It ensures that changes made to the database are durably stored in the redo logs before committing transactions. LGWR plays a crucial role in database recovery and maintaining data integrity.

  5. Checkpoint (CKPT): CKPT is responsible for signaling the DBWn processes to perform a checkpoint. A checkpoint flushes modified database buffers to disk and updates the control file and data file headers. It helps in reducing the instance recovery time during a crash or failure.

  6. Archiver (ARCn): The archiver process (ARCn) copies online redo log files to archive destinations for backup and recovery purposes. It ensures the availability of redo logs beyond the point of online log switching and enables point-in-time recovery.

  7. Dispatcher (Dnnn): Dispatchers are used in Shared Server configurations, where multiple client connections are served by a smaller number of dedicated server processes. Dispatchers receive client requests and direct them to the appropriate dedicated server process.

  8. Job Queue Processes (CJQn): Job Queue processes manage and execute scheduled jobs in the database. They handle tasks such as running stored procedures, executing PL/SQL blocks, or launching external programs as part of scheduled jobs.

These are some of the important background processes in Oracle Database. Each process plays a critical role in maintaining the integrity, availability, and performance of the database system.


PostgreSQL Background Process


 Background Process In PostgreSQL


In PostgreSQL, background processes are responsible for performing various tasks to support the functioning of the database system. These processes run continuously in the background and handle tasks such as maintenance, monitoring, and background operations. Here are some important background processes in PostgreSQL:

  1. Autovacuum: The autovacuum process is responsible for managing the automatic maintenance of database tables. It identifies and removes dead tuples (unused rows) from tables, updates statistics, and performs other essential maintenance tasks to optimize the performance of the database.

  2. Checkpointer: The checkpointer process writes dirty (modified) database buffers from memory to disk in a controlled manner. It helps in reducing the amount of time required for database recovery in case of a system crash and ensures that changes are durably stored on disk.

  3. Background Writer: The background writer process performs the task of writing dirty database buffers to disk when the system is under heavy load. It helps in reducing the I/O burden on the server by asynchronously writing the modified data to disk.

  4. WAL Writer: The Write-Ahead Log (WAL) writer process writes the WAL buffers to the disk. The WAL is a critical component of PostgreSQL's crash recovery mechanism, ensuring durability and consistency of transactions.

  5. Startup Process: The startup process is responsible for database startup and crash recovery. It coordinates with other background processes to perform necessary tasks during the database startup process.

  6. Archiver: The archiver process is responsible for managing the archiving of the Write-Ahead Log (WAL) segments. It copies the WAL files to a designated archive location for backup and point-in-time recovery purposes.

  7. Replication Processes: In a replication setup, PostgreSQL uses background processes for replication purposes. These processes include the sender process (sends WAL to replicas) and the receiver process (receives and applies WAL from the primary server).

  8. Background Workers: PostgreSQL allows the creation of custom background worker processes to perform specific tasks. These background workers can be created by extensions or custom applications to handle additional functionality beyond the core database processes.

These are some of the important background processes in PostgreSQL, and each plays a crucial role in ensuring the stability, performance, and durability of the database system.

DDL for all tablespace in oracle database.

 SQL> select 'create tablespace ' || df.tablespace_name || chr(10)
 || ' datafile ''' || df.file_name || ''' size ' || df.bytes
  2   || decode(autoextensible,'N',null, chr(10) || ' autoextend on maxsize '
 || maxbytes)
 || chr(10)
 || 'default storage ( initial ' || initial_extent
  3    4    5    6   || decode (next_extent, null, null, ' next ' || next_extent )
 || ' minextents ' || min_extents
 || ' maxextents ' ||  decode(max_  7  extents,'2147483645','unlimited',max_extents)
 || ') ;' as TBS_DDL
 from dba_data_files df, dba_tablespaces t
 where df.tablespace_name=t.tablespace_name
/  8    9   10   11   12   13

TBS_DDL
----------------------------------------------------------------------
create tablespace SYSTEM
 datafile '/oradata/vijay/system01.dbf' size 838860800
 autoextend on maxsize 34359721984
default storage ( initial 65536 minextents 1 maxextents unlimited) ;

create tablespace SYSAUX
 datafile '/oradata/vijay/sysaux01.dbf' size 503316480
 autoextend on maxsize 34359721984
default storage ( initial 65536 minextents 1 maxextents unlimited) ;

create tablespace UNDOTBS1
 datafile '/oradata/vijay/undotbs01.dbf' size 62914560
 autoextend on maxsize 34359721984
default storage ( initial 65536 minextents 1 maxextents unlimited) ;

create tablespace USERS
 datafile '/oradata/vijay/users01.dbf' size 5242880
 autoextend on maxsize 34359721984
default storage ( initial 65536 minextents 1 maxextents unlimited) ;


How to get self SID in Oracle


SQL> SELECT SYS_CONTEXT ('USERENV', 'CURRENT_SCHEMA') AS username, sys_context('USERENV','SID') "My SID" from dual;

USERNAME       My SID
-------------- --------
SHAAN          138


SQL> select sys_context('USERENV','SID') "My SID" from dual;

My SID
--------
138


Last DDL and DML Date/Time of Any Table

 Get Last DDL and DML Date Time Of Any Table.


SQL> alter session set nls_date_format='DD-MON-YYYY HH24:MI:SS';

Session altered.


SQL>  select (select last_ddl_time from dba_objects where object_name='EMP' and owner='SHAAN') "DDL Time",
decode(maxscn,0,'N/A',scn_to_timestamp(maxscn)) "DML Time"
from (select nvl(max(ora_rowscn),0) maxscn from SHAAN.EMP);   2    3

DDL Time             DML Time
-------------------- ----------------------------------------
05-OCT-2022 22:30:16 05-OCT-22 10.31.21.000000000 PM


SQL> col "Owner Object" for a30
set lines 200 pages 1000
 select (select owner||'.'||object_name from dba_objects where object_name='EMP' and owner='SHAAN') "Owner Object",
 (select created from dba_objects where object_name='EMP' and owner='SHAAN') "Created Time",
 (select last_ddl_time from dba_objects where object_name='EMP' and owner='SHAAN') "DDL Time",
 decode(maxscn,0,'N/A',scn_to_timestamp(maxscn)) "DML Time"
 from (select nvl(max(ora_rowscn),0) maxscn from SHAAN.EMP);SQL> SQL>   2    3    4    5

Owner Object                   Created Time         DDL Time             DML Time
------------------------------ -------------------- -------------------- ----------------------------------------
SHAAN.EMP                      05-OCT-2022 22:30:16 05-OCT-2022 22:30:16 05-OCT-22 10.31.21.000000000 PM


ORA-65096: invalid common user or role name

 ORA-65096: invalid common user or role name means you logged on the CDB where you should be logged into a PDB.


This can be avoid by setting hidden parameter "_ORACLE_SCRIPT"=true.


Since this hidden parameter hence it is always advisable to use it under direction of Oracle Support.


SQL> create user shaan identified by shaan123 default tablespace users quota unlimited on users;
create user shaan identified by shaan123 default tablespace users quota unlimited on users
            *
ERROR at line 1:
ORA-65096: invalid common user or role name


SQL> alter session set "_ORACLE_SCRIPT"=true;

Session altered.

SQL> create user shaan identified by shaan123 default tablespace users quota unlimited on users;

User created.

SQL> grant connect, resource to shaan;

Grant succeeded.

SQL> conn shaan/shaan123
Connected.
SQL> show user
USER is "SHAAN"
 

ORA-01578: ORACLE data block corrupted

 Recently we saw below error in our alert log.


Errors in file


 /oracle/app/diag/rdbms/VIJAY/trace/VIJAY_ora_70454.trc  (incident=2300411):
ORA-01578: ORACLE data block corrupted (file # 182, block # 12483)
ORA-01110: data file 182: '/oradata1/VIJAY/audsys_ts_01.dbf'
ORA-26040: Data block was loaded using the NOLOGGING option


To fix the above error we followed below steps ;


SQL> select owner,segment_name,segment_type,tablespace_name from dba_extents 
     where file_id=182 and 12483 between block_id AND block_id+blocks-1;
 
OWNER           SEGMENT_NAME          SEGMENT_TYPE       TABLESPACE_NAME
--------------- ------------------- ------------------ -----------------
JAIDBA         AUD$UNIFIED            TABLE              AUDSYS_TS


SQL> select count(*) from JAIDBA.AUD$UNIFIED;
select count(*) from JAIDBA.AUD$UNIFIED
       *
ERROR at line 1:
ORA-01578: ORACLE data block corrupted (file # 182, block # 12483)
ORA-01110: data file 182: '/oradata1/VIJAY/audsys_ts_01.dbf'
ORA-26040: Data block was loaded using the NOLOGGING option


SQL> BEGIN

DBMS_REPAIR.SKIP_CORRUPT_BLOCKS (

SCHEMA_NAME => 'JAIDBA',

OBJECT_NAME => 'AUD$UNIFIED',

OBJECT_TYPE => dbms_repair.table_object,

FLAGS => dbms_repair.SKIP_FLAG);

END;

/  2    3    4    5    6    7    8


PL/SQL procedure successfully completed.


SQL> select SKIP_CORRUPT
from dba_tables
where owner = 'JAIDBA'
and table_name = 'AUD$UNIFIED';
  2    3    4
SKIP_COR
--------
ENABLED


SQL> alter table JAIDBA.AUD$UNIFIED move;
 
Table altered.


SQL> select count(*) from JAIDBA.AUD$UNIFIED;
 
  COUNT(*)
----------
         0


Stop/Start RAC services

Stop RAC services

Stop Listener:

$ srvctl stop listener -n ol7-122-rac1

$ srvctl status listener -n ol7-122-rac1


Stop database:

$ srvctl stop database -d VIJAY

$ srvctl status database -d VIJAY


Stop ASM:

$ srvctl stop asm -n ol7-122-rac1 -f

$ srvctl status asm -n ol7-122-rac1


Stop nodeapps:

$ srvctl stop nodeapps -n ol7-122-rac1 -f

$ srvctl stop nodeapps -n ol7-122-rac2 -f


Stop crs:

# crsctl stop crs

# crsctl check cluster -all


Start RAC Services:

Start crs:

crsctl start crs

crsctl start res ora.crsd -init

crsctl check cluster -all

Start Nodeapps

srvctl start nodeapps -n ol7-122-rac1/2

srvctl status nodeapps -n  ol7-122-rac1/2


Start asm

srvctl start asm -n ol7-122-rac1/2

srvctl status asm -n ol7-122-rac1/2


Start database:

srvctl start database -d VIJAY


Start listener

srvctl start listener -n ol7-122-rac1/2

srvctl status listener -n ol7-122-rac1/2


Backup OCR


1. OCR Dumps

[root@ol7-122-rac1 bin]# ./ocrconfig -export ocr_backup_`date +%Y%m%d`.dmp

PROT-58: successfully exported the Oracle Cluster Registry contents to file 'ocr_backup_20220922.dmp'

2. OCR Backups

[root@ol7-122-rac1 bin]# ./ocrconfig -manualbackup

ol7-122-rac1     2022/09/22 11:43:13     +DATA:/ol7-122-cluster/OCRBACKUP/backup_20220922_114313.ocr.308.1116070995     0

[root@ol7-122-rac1 bin]# ./ocrconfig -showbackup

ol7-122-rac2     2022/09/20 01:48:38     +DATA:/ol7-122-cluster/OCRBACKUP/backup00.ocr.288.1115862509     0

ol7-122-rac2     2022/09/20 01:48:38     +DATA:/ol7-122-cluster/OCRBACKUP/day.ocr.289.1115862519     0

ol7-122-rac2     2022/09/20 01:48:38     +DATA:/ol7-122-cluster/OCRBACKUP/week.ocr.290.1115862521     0

ol7-122-rac1     2022/09/22 11:43:13     +DATA:/ol7-122-cluster/OCRBACKUP/backup_20220922_114313.ocr.308.1116070995     0

Restore full database on different server with same name.


Here I am taking example of database ORA11G which is hosted on oel1.oracle.com and restoring this on oel2.oracle.com with same name.

Assuming we have different file system on both servers.

  • Copy pfile and passwordfile from oel1.oracle.com to $ORACLE_HOME/dbs location of oel2.oracle.com and modify pfile per current server i.e. controlfile, adump location etc. also remove all hidden parameters from pfile.
  • Restore controlfile that was taken after level0 backup to oel2.oracle.com at location define in pfile.
  • Now create script to restore database.

·         In below script we are using ‘SET NEWNAME’ because we have different file system.
·         At the end of script we are using ‘SWITCH DATAFILE ALL;’ to update controlfile with new location.
·         Recover database command will restore archive logs from tape to disk on location mention in archive dest log_archive_dest_1, and start recovery.
·         Channels are multiple hands of RMAN to restore datafiles.


export ORACLE_SID=DB11G
rman target / <<! >DB11G_rman_restore.log
run {
sql 'alter session set optimizer_mode=rule';
allocate channel a1 type 'sbt_tape';
allocate channel a2 type 'sbt_tape';
allocate channel a3 type 'sbt_tape';
allocate channel a4 type 'sbt_tape';
send 'NB_ORA_SERV=denver, NB_ORA_CLIENT=ora11gdb-g1';
SET NEWNAME FOR DATAFILE 4 to '/u01/app/oracle/oradata/DB11G/datafile/o1_mf_users_8yobsg8j_.dbf';
SET NEWNAME FOR DATAFILE 3 to '/u01/app/oracle/oradata/DB11G/datafile/o1_mf_undotbs1_8yobsg7w_.dbf';
SET NEWNAME FOR DATAFILE 2 to '/u01/app/oracle/oradata/DB11G/datafile/o1_mf_sysaux_8yobsg7o_.dbf';
SET NEWNAME FOR DATAFILE 1 to '/u01/app/oracle/oradata/DB11G/datafile/o1_mf_system_8yobsg0w_.dbf';
SET NEWNAME FOR DATAFILE 5 to '/u01/app/oracle/oradata/DB11G/datafile/vijay_ts_01.dbf';
RESTORE DATABASE;
SWITCH DATAFILE ALL;
RECOVER DATABASE;
}
Exit;

  • Startup mount, and then get to know the max. Sequence of archive file information from the v$log_history. This will tell us, till what sequence recovery is needed.

    SQL> startup nomount;
    ORACLE instance started.

    Total System Global Area  413372416 bytes
    Fixed Size                  2213896 bytes
    Variable Size             306186232 bytes
    Database Buffers          100663296 bytes
    Redo Buffers                4308992 bytes
    SQL> alter database mount;

    Database altered.


    SQL> SELECT MAX(SEQUENCE#) FROM V$LOG_HISTORY;

    MAX(SEQUENCE#)
    --------------
                39

  • Now database is ready for restoration. Run restore script that we have prepared at step number 3.
 
 
[oracle@oel2 script]$ nohup sh restore_db11g.sh &
[1] 24665
[oracle@oel2 script]$ nohup: ignoring input and appending output to `nohup.out'
 
  • Once restore and recovery completes, login to sqlplus and rename redolog file before executing resetlog command, because if we don’t rename it to TST11G directory then while resetlog it will look for ORA11G directory to create redolog file and this may cause database corruption.

SQL> select member from v$logfile;

MEMBER
--------------------------------------------------------------------------
/u01/app/oracle/oradata/ORA11G/onlinelog/o1_mf_3_90ob65o7_.log
/u01/app/oracle/oradata/
ORA11G/onlinelog/o1_mf_2_90ob64x1_.log
/u01/app/oracle/oradata/
ORA11G/onlinelog/o1_mf_1_90ob64bj_.log

SQL> alter database rename file '/u01/app/oracle/oradata/ORA11G/onlinelog/o1_mf_3_90ob65o7_.log' to '/u01/app/oracle/oradata/TST11G/onlinelog/o1_mf_3_90ob65o7_.log';

Database altered.

SQL> alter database rename file '/u01/app/oracle/oradata/ORA11G/onlinelog/o1_mf_2_90ob64x1_.log' to '/u01/app/oracle/oradata/TST11G/onlinelog/o1_mf_2_90ob64x1_.log';

Database altered.

SQL> alter database rename file '/u01/app/oracle/oradata/ORA11G/onlinelog/o1_mf_1_90ob64bj_.log' to '/u01/app/oracle/oradata/TST11G/onlinelog/o1_mf_1_90ob64bj_.log';

Database altered.

SQL> alter database open resetlogs;

Database altered.

SQL> select instance_name, host_name from v$instance;

INSTANCE_NAME    HOST_NAME
---------------- ---------------------------------
ORA11G           oel2.oracle.com

SQL> select name, open_mode from v$database;

NAME      OPEN_MODE
--------- --------------------
ORA11G    READ WRITE

SQL> select count(*) from v$recover_file;
 
COUNT(*)
----------
         0


Add new mountpoint on your linux server

  Below are the steps to follow for adding any new mount on you linux machine. [root@oem ~]# fdisk -l Disk /dev/sdb: 53.7 GB, 53687091200 by...